- Deck beams, mast steps and carlins fitted
This Blog is about the building of a sailing canoe designed by Edward R. Weber from around 1942/1943 for sailing on Barnegat bay (http://en.wikipedia.org/wiki/Barnegat_Bay). I purchased the plans from D.N Goodchild (http://www.dngoodchild.com/5408.htm) for approximately US$7.95, not including postage. The Scherzo is based on Edward Weber’s Kingfisher Class Sailing Canoe of 1938 featured in Motor Boating’s magazine, but is a couple if feet longer at 13′ with a 40″ beam. Given the cheap price of the plans I purchased both the Scherzo and the Kingfisher plans which provided me with a good perspective for understanding the modifications that Weber introduced for better performance. Scherzo will be built at the Wooden Boat Centre (http://www.woodenboatcentre.com.au) in Docklands, Melbourne Australia, under the guidance of Brian, Nick and the rest of the crew.

Decking
Scherzo’s original construction method is painted canvas on a wooden frame. I’ll be using the more modern materials of strip wood construction with fibreglass sheathing and plywood decking. I am cutting the station moulds and some other pieces using CNC technology with the help of Richard from Wooden Boat Kits. The plans were difficult to read as expected given that it was an older construction method and were hand printed. Despite this, Richard has been of great help and has a very detailed eye for ensuring that I get the boat I want. Other changes to the original construction include replacing the galvanised centre plate with a foil shaped centreboard. The original sail plan options include a stayed sloop rig with a bermuda/marconi main sail and jib, and a lateen rig using bamboo spars. I am currently investigated a high aspect balanced lug sail instead of either of these rigs. I would prefer an easily handled and simply designed single main sail without the need for shrouds and stays. The balanced lug sail as used on many of Iain Oughtred’s and Michaels’ Storer’s Goat Island Skiff (http://www.storerboatplans.com/GIS/GISplan.html) is a very appealing solution.

The Scherzo is being built mostly for sailing and for some some use as a fishing platform is quiet waters. I am investigating a number of alternative propulsion methods for using the canoe in rivers and inland waters for fishing. Some of the options that have come up include oars, SUP paddles, double ended paddles and even a Hobie Mirage Peddle Cassette (http://www.hobiecat.com.au/fishing/kayaks/outback/).
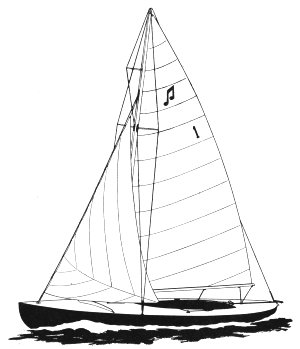
Artists impression
My inspiration for choosing the Scherzo design was the following critieria:
- Car toppable for one person (under 55kg and less than 16ft long)
- Simple to set up the sail and launch
- Able to be launched by being carried or rolled to the water on a beach dolly
- The option of alternative propulsion such as paddling etc in quiet waters for fishing or exploring.
- Flat water/ inland water use
- Exciting and challenging sailing for my current abilities
I could not find any canoe designs currently available that met all of these criteria to my specifications. Most were either too long, too narrow for my preference or were either purely sailing or purely paddling. Some great designs, but not suitable for what I wanted them to be. Building the Scherzo will be a bit of a risk in terms of what I want and what it actually becomes (the hull is already looking lighter and more slippery than I imagined), but I also like the idea of resurrecting a unique design from the past and improving it with modern building techniques.
I hope you enjoy the build,
Andrew
26 March 2013: Forms are cut and ready for the jig.

Update as of 25 Sep 2013:
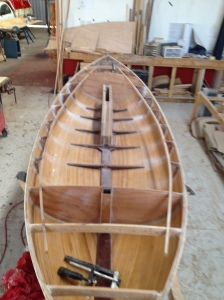
With the sale of Andala I have been able to invest a little more time, and money, into the build. Here are some shots of the strip build process using hoop pine over MDF forms. I’m really happy with the result and the little boats lines as it’s wide beam makes it look very much like a miniature version of a large sail boat rather than a kayak or canoe. It will be interesting to see how it performs. It has taken just under 3 days work with the help of a second person, and occasionally a third to get to this point:

Bare hull with my new drill

View from the bow

View from the Port side. Bow is on the right of the photo. Notice Nick’s miniature Tug Boat behind my canoe?

Another view of the stern and starboard side. The remaining planks should conform nicely now that the hard work on the waterline has been finished.
I was leaning towards a painted finish with varnished ply deck, but am now considering a varnished hull, possibly painted below the waterline given how well it has gone together. It would be a shame to not show of those lines. I’ve used PVA glue on the wood strips and will let it sit for a few days before I start pulling out the nails. We’ve also been squeezing the glue into any gaps that occur in between the bead and coves as they conform to the forms. I’ve also used small MDF strips covered in packing tape (so they don’t glue to the wood) to create a buffer between the nail head and the wood to prevent creating any divots on the hull when I pull them out with pliers. I switched to the anil gun after the staple gun and compressor failed to work very well. Although the steel nails will probably leave rust spots on the hull over time (even after they are removed) they also come out a lot more easily than the staples – probably due to their strength and because they are single unlike the staples.
9mm MDF worked fine for the moulds/forms, but 12mm would have been even better – less nails would have missed the form. I also used laminated inner stems for the stern and bow which have already been fixed in place. I have already made up the exterior stems and plan on putting a keel down the middle of the boat.

The stern and bow moulds for the stem laminations. MDF cut to shape and screwed to a board and then the workbench.

Clamps on the thin laminations and an excessive amount of epoxy on all surfaces.

Plastic wrap prevents the laminations from gluing to the mould. Once the inner stems were complete I cleaned them up and used them as moulds for the outer stems. A metal ruler can be seen applied on the outer edge of the stem laminations to prevent wood from splitting when they are bent.


Wooden Boat Forum link:
http://forum.woodenboat.com/showthread.php?161092-First-build-a-13ft-x-40inch-sailing-canoe

Rudder & Centreboard construction

Centreboard

External sheathing

Faired hull

Outer keel


Hi
Nice blog, thank you.
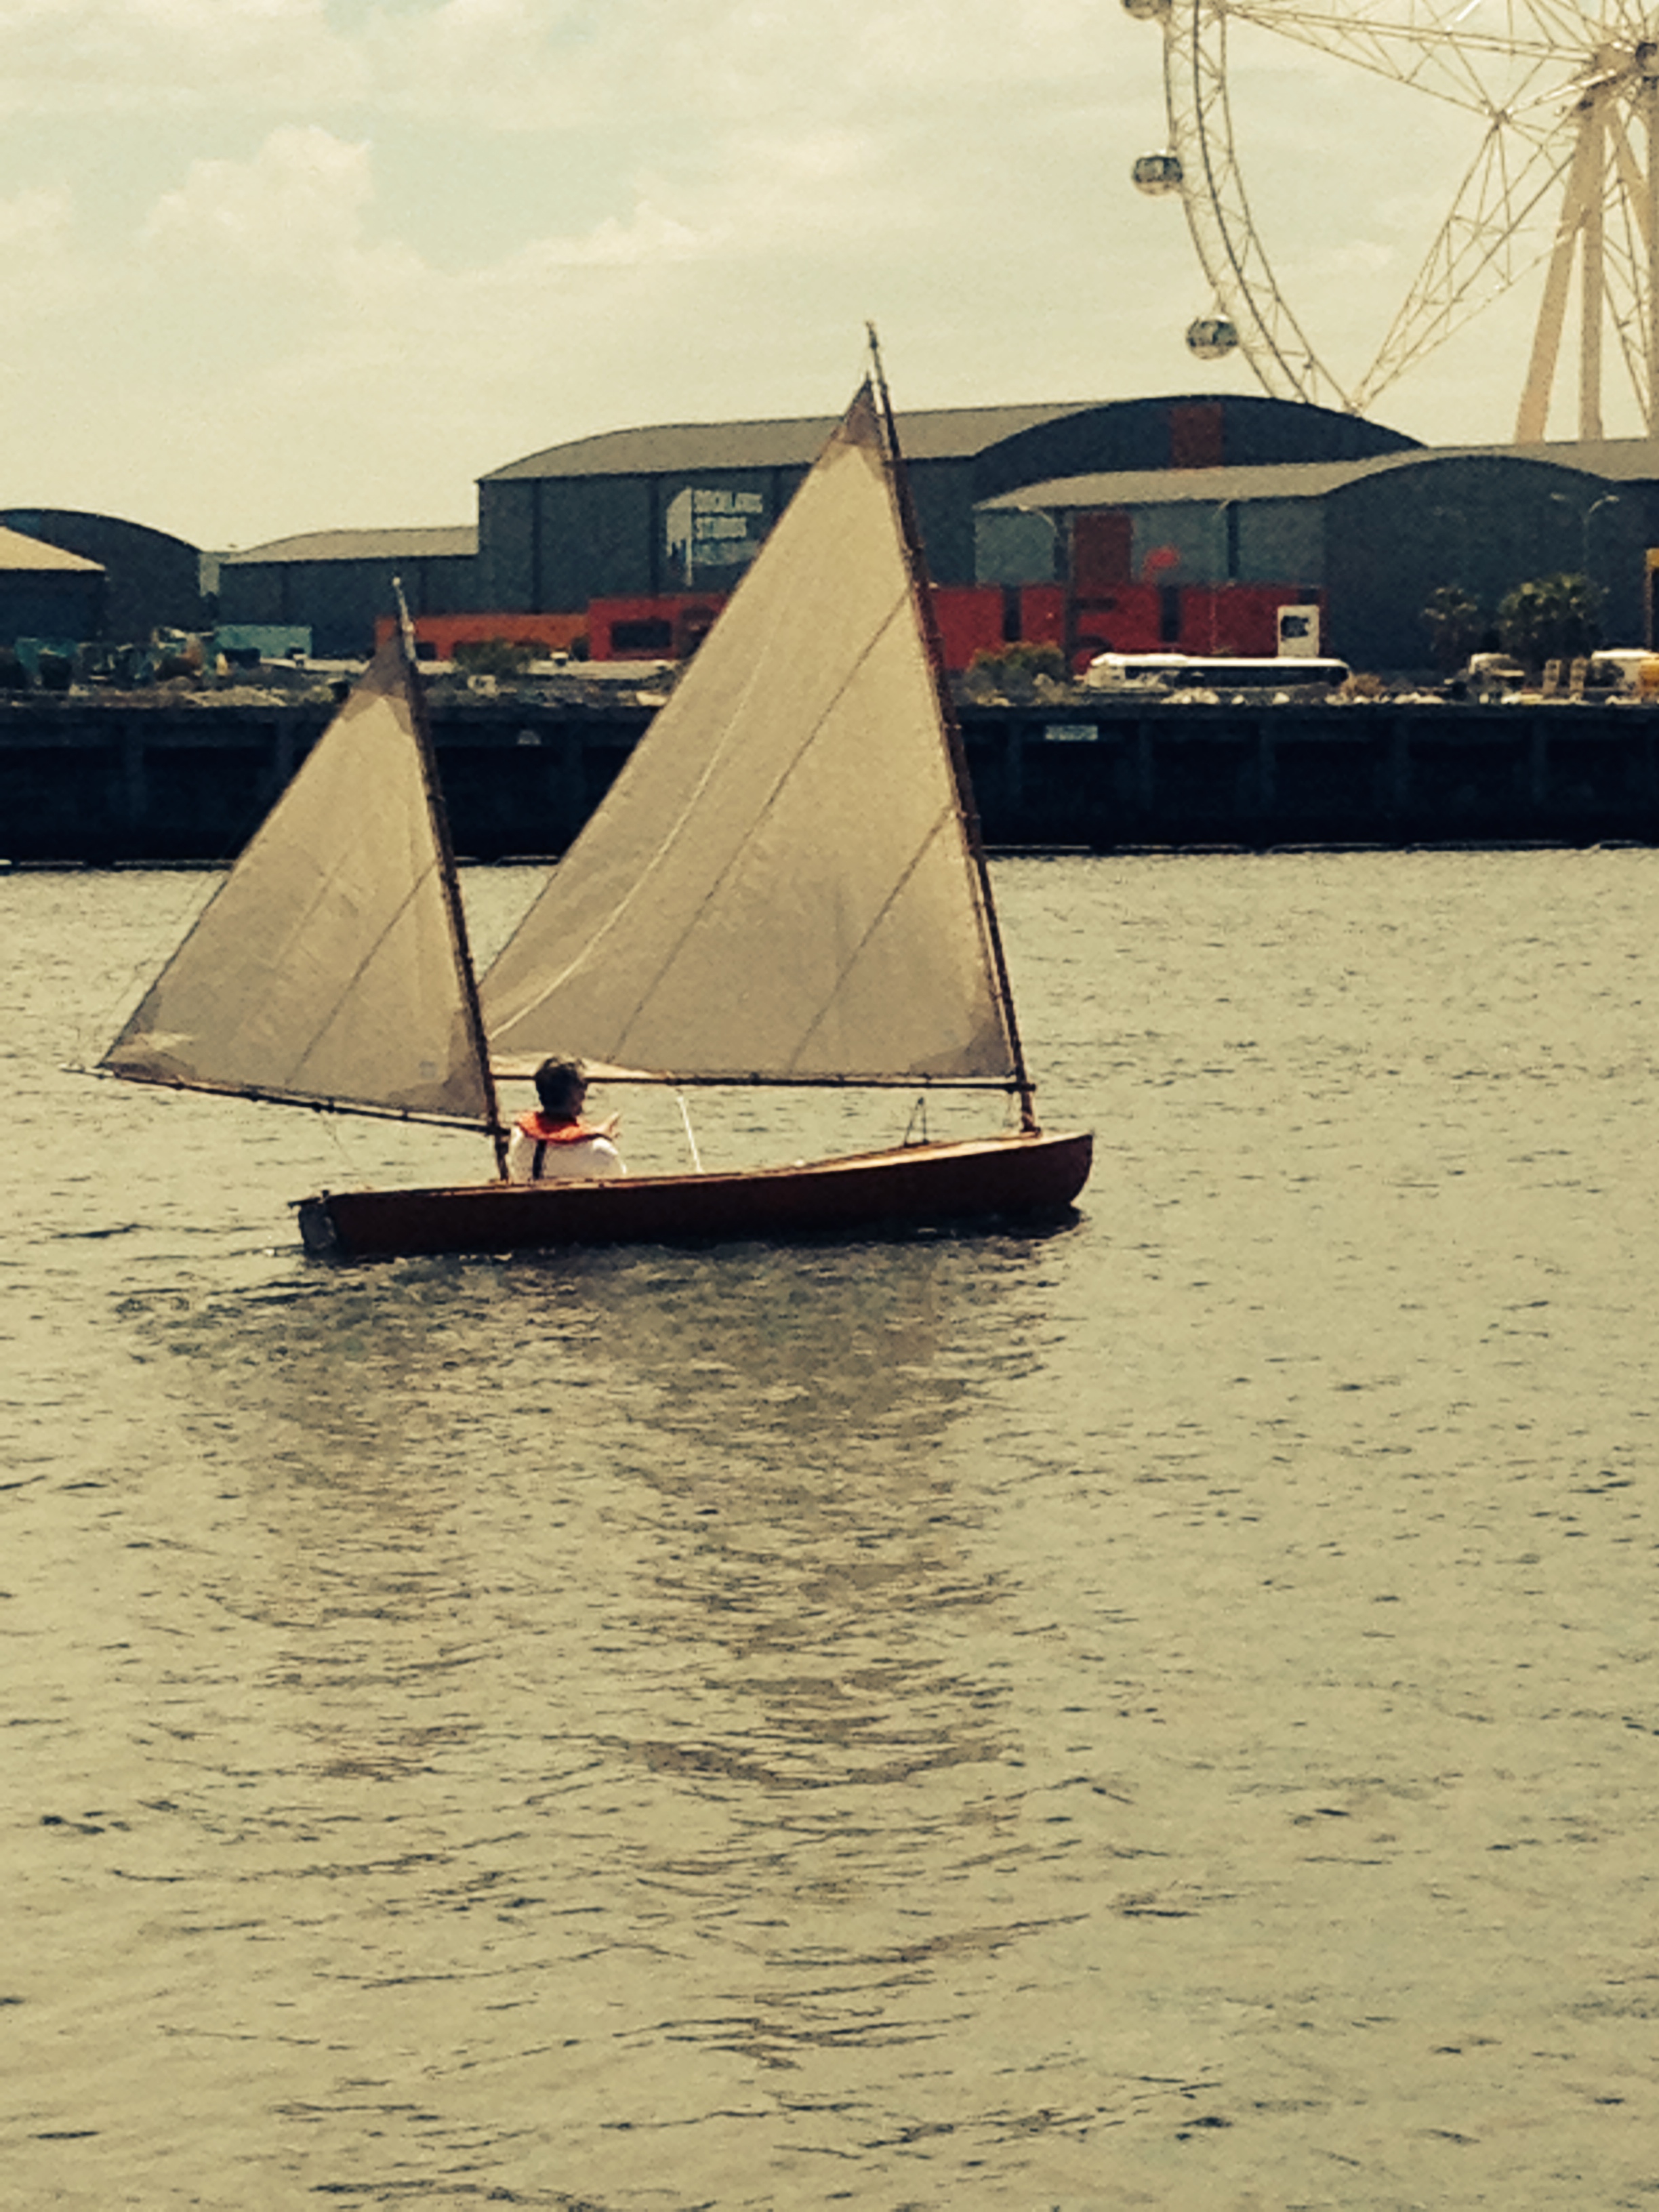
I’d love to see some photos of Scherzo afloat, and I’d be very interested to hear about your experiences of her performance under sail.
WoodenBoat’s review of Piccolo (12 feet 8 inches by 30 inches) that she was “steady in a 20 knot breeze” with two aboard, something I’d be interested to see first-hand, given that 20 knots is the top end of Force 5, at which point most small yachts would either be heading for home or thinking about it. Scherzo, though, has an extra 10 inches of beam, so there’s some scope for you to shift your weight to windward inside the hull, or to hike out.
Best wishes
Nicholas
Hi Nicholas,
Thanks for the interest in my blog. At present the boat is still being built. I’m just fairing the hull and about to sheath it in fibreglass this Friday. I’m also part way through the centreboard and rudder build which is based on the NACA profile as provided on the Duckworks Magazine website. The original design was for a 20 inch galvanised plate. As for two people I’m fairly confident that I will be able to fit two people crammed into it once it’s complete and will probably have to hike out when sailing solo. Paddling or rowing is a nice to have, not a must have. The centreboard case takes up some room but not as much as you would think. There will be about 2 1/2 feet between the end of the case and the back of the cockpit. The sail plan I’ve chosen is a cat ketch rig using leg o’ mutton sails (boom at the bottom) out of Tod Bradshaw’s Canoe Sailing book. The whole build is very much experimental considering it was designed for canvas on a wood frame and a sloop rig. I expect I may have to try different rigs amongst other things, but then that’s all part of the process.
I’ll be sure to keep posting photos as I go and am aiming to get it in the water in the next couple of months now that the holidays are here and I can dedicate a bit more time to the build.
The closest design I’ve found in terms of beam and length is the Solway Dory sailing canoes which are reported to sail well, and there’s even an adirondack guide boat somewhere on the net that’s been converted to sailing which you may want to research.
All the best,
Andrew